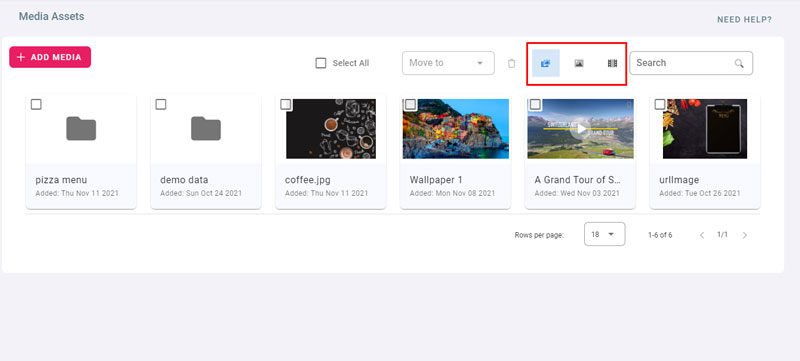
Media Assets
Media Assets is a media library of videos, images and PDFs.
- It supports most videos and images formats, in addtion to PDF files.
- Files uploaded and imported to playlists can be managed from Media Assets.
- Also, if you haven’t created playlists yet, files can be uploaded from media assets and reused in multiples playlists without having to upload them again.
- Media Assets helps organise media by folders. It also allows to search through media by name and type.
Important Note
Files deleted from the media assets will be deleted from all the playlists they are used in.
Upload Media
- Click on Add Media
- Click on Upload Media Assets
- You can upload from your device, Dropbox, OneDrive, and Facebook
- Select your files and wait for the upload to complete
- Click on Done
Media Assets Settings
- Hover the media item and click on the settings icon on the top right corner
- You can rename the media assets, delete them, enable proof of play and add tags
- Click on Save to save the new settings
Create Folders
- Click on Add Media
- Click on Add Folder
- Type in the folder name
- Click on Add
- Subfolders can be created inside other folders
- To rename a folder or delete it, click on the settings icon on the top right corner of the folder
Move media assets to folders
- Click on the check box on the top left of the media asset to select it
- Select one or multiple assets
- Click on Move to drop down and click on the destination folder
- Your assets will be moved to the destination folder
- Click on a folder to view its content
- To directly Add media assets inside folders, Click on Add, then Add media Assets
- To create sub folders, click on Add, then Add Folder while you are inside the folder
- To navigate through folders or return to top level, use the navigation bar
Filter
- Use the buttons marked in red to respectively Show All, Show Images Only, Show Videos Only
Search
- Type in a search text to filter the media assets and folders by name

